

Amlogic s9xxx openwrt编译及刷机详细教程
一、编译基于amlogic s9xxx的openwrt固件
- amlogic s9xxx openwrt编译的过程可参考本站openwrt固件编译贴
- 本次以中兴b860av2.1 电视盒为例编译openwrt固件
- 第四个步骤进行适当修改
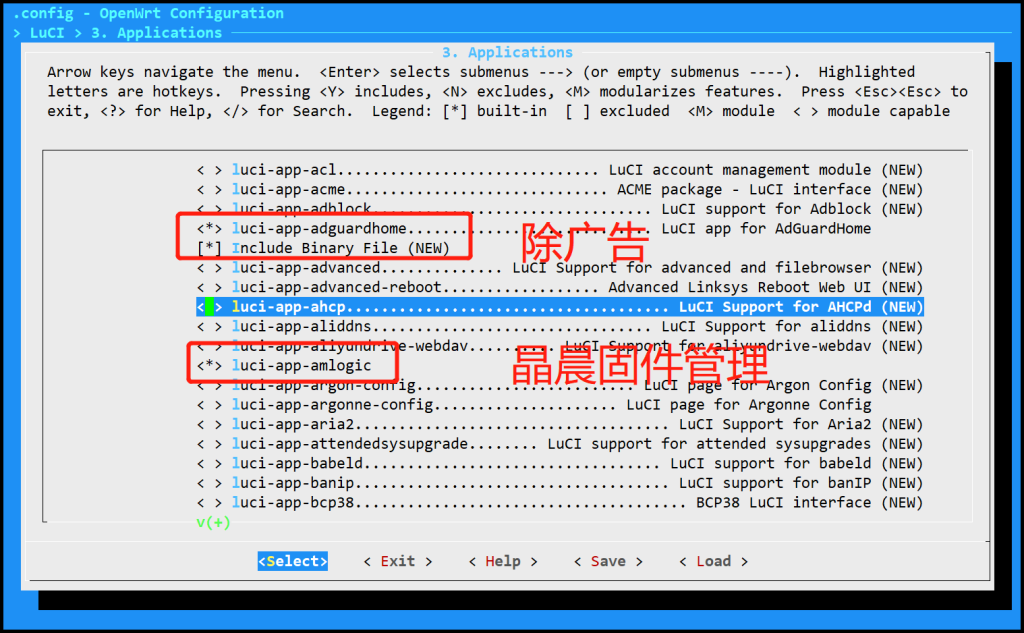
- 添加所需的feed源后,增加luci-app-amlogic包(固件管理)
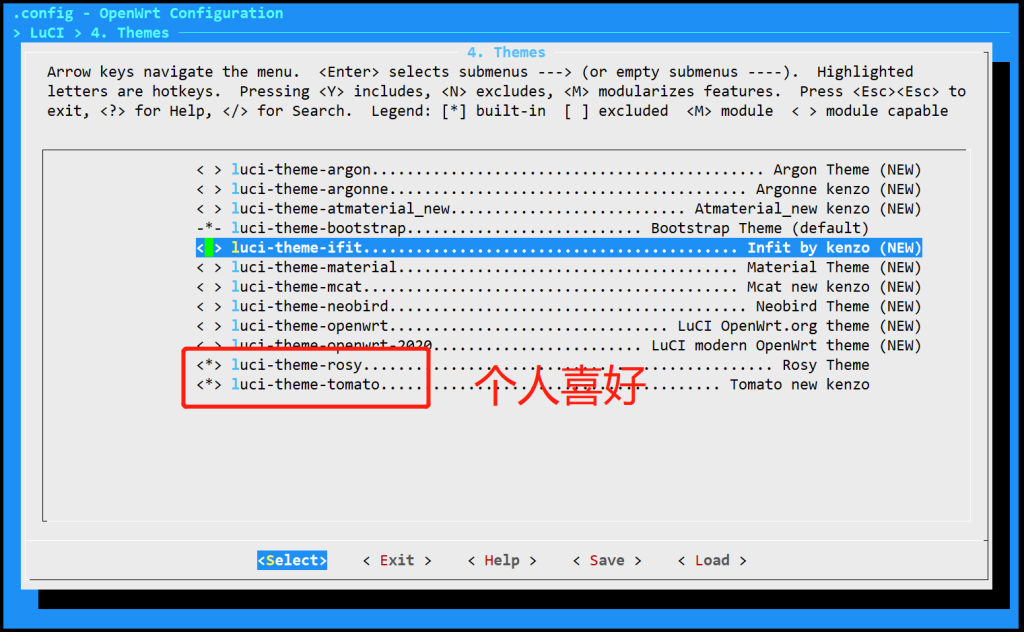
- 增加luci-theme-rosy包(本项可选,增加rosy主题)
- 更新并安装软件包
king@ubuntu:~$ cd ~/openwrt/package/
king@ubuntu:~/openwrt/package$ git clone https://github.com/ophub/luci-app-amlogic.git
king@ubuntu:~/openwrt/package$ git clone https://github.com/rosywrt/luci-theme-rosy.git
king@ubuntu:~/openwrt/package$ cd ../
king@ubuntu:~/openwrt$ ./scripts/feeds update -a && ./scripts/feeds install -a- 配置固件及内核
- b860av2.1cpu架构为Quad-core ARM Cortex-A53 CPU
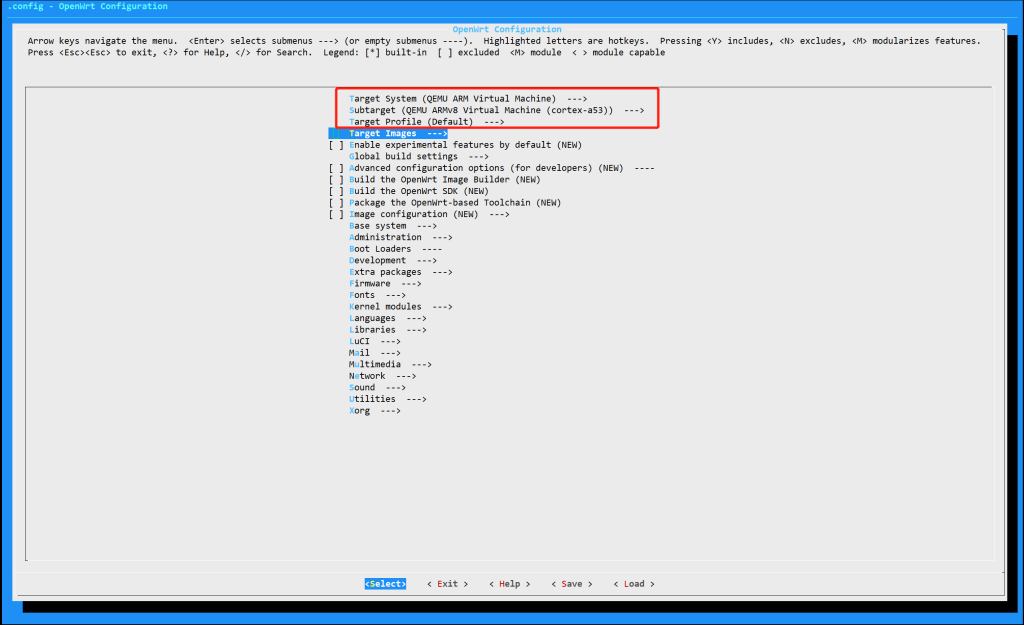
- 执行make menuconfig按照下图进行配置
- Target System 选择 QEMU ARM Virtual Machine
- Subtarget选择QEMU ARMv8 Virtual Machine(cortex-a53)
- Target Profile选择Default
pangzhai@ubuntu:~/openwrt$ make menuconfig
- 设置Target Images
- Root filesystem partition size 设置为2048或者4096,root分区设置大点避免出错
- 勾选tar.gz文件系统输出

- 先设置需要的软件包(luci-applications)
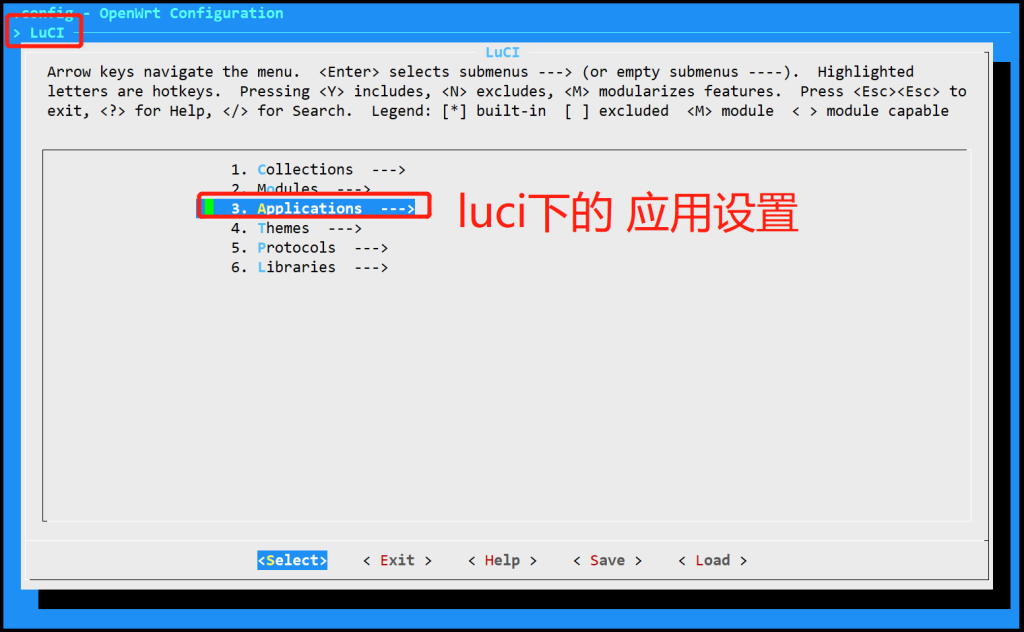
- 这里只演示勾选部分,其他根据需要勾选

- luci-themes下设置主题,个人只爱这两款
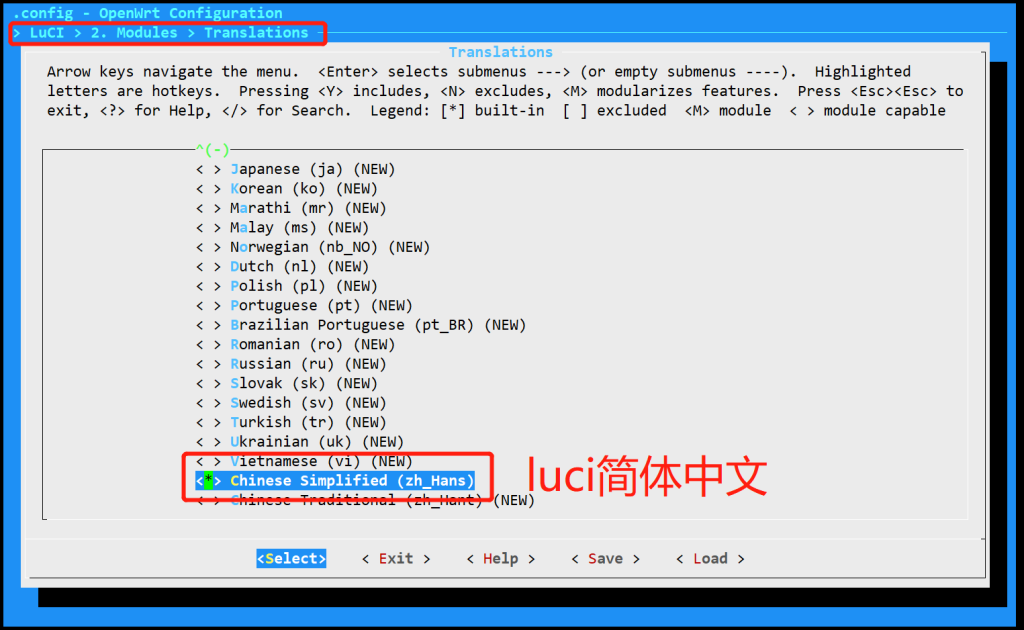
- 默认luci界面中文包
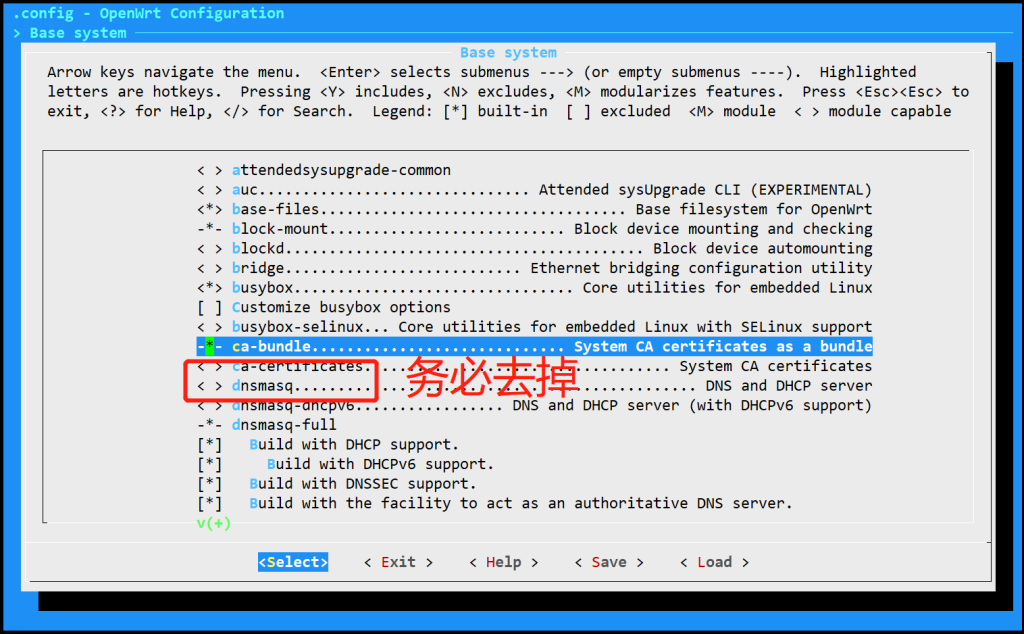
- base system 里面的dnsmasq项务必每次检查
- 如果和下面的dnsmasq-full同时勾选的情况下,务必去掉勾选,否则编译报错(bug)
- 保存配置,自动生成.config文件。其它软件包可以在线更新
- 也可使用胖宅花园的资源(固件、ipk包、编译用dl包)
- 下载所需要的dl软件包(需要科学上网,或者从本站下载,省时N小时)
king@ubuntu:~/openwrt$ make -j5 download V=s- 执行编译命令(make -j5 V=s 其中-j5 5是指编译系统线程数+1 V=s是详细输出日志)
king@ubuntu:~/openwrt$ make -j5 V=s- 编译完后,生成的openwrt固件在~/openwrt/bin目录下

二、对生成的arm版openwrt固件进行打包,适配Amlogic S9xxx
- 更新ubuntu操作系统apt-get源版本并安装打包相应依赖
- 用root用户ssh登陆
root@ubuntu:~# apt-get update -y
root@ubuntu:~# apt-get full-upgrade -y
root@ubuntu:~# apt-get install -y build-essential asciidoc binutils bzip2 gawk gettext git libncurses5-dev libz-dev uuid uuid-dev uuid-runtime patch python3 python2.7 xz-utils rename gzip unzip zlib1g-dev lib32gcc1 libc6-dev-i386 subversion flex uglifyjs git-core gcc-multilib pigz zstd zip p7zip p7zip-full msmtp libssl-dev texinfo libglib2.0-dev xmlto qemu-utils upx libelf-dev autoconf automake libtool autopoint device-tree-compiler g++-multilib antlr3 gperf wget curl swig rsync- 下载amlogic-s9xxx-openwrt工程到本地
root@ubuntu:~# git clone --depth 1 https://github.com/ophub/amlogic-s9xxx-armbian.git- 创建openwrt-armvirt目录
- 复制第一步生成的openwrt固件到目录下(openwrt-armvirt-64-default-rootfs.tar.gz)
root@ubuntu:~# mkdir -p ~/amlogic-s9xxx-openwrt/openwrt-armvirt/
root@ubuntu:~# cp /home/king/openwrt/bin/targets/armvirt/64/openwrt-armvirt-64-default-rootfs.tar.gz ~/amlogic-s9xxx-openwrt/openwrt-armvirt/- 设置svn代理,否则慢的像乌龟
- 切换到amlogic-s9xxx-openwrt目录
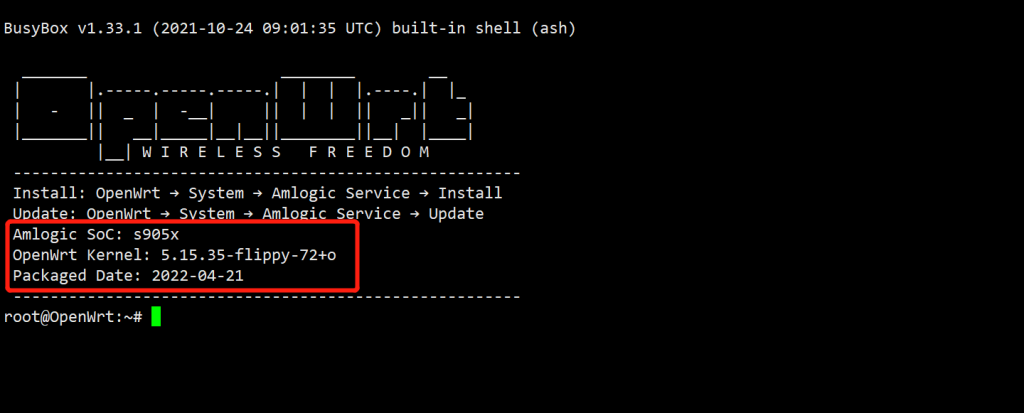
- 执行编译命令./make -d -b s905x -k 5.15.35
root@ubuntu:~# ./make -d -b s905x -k 5.15.35- 关于参数说明(参考amlogic-s9xxx-openwrt打包)
| 参数 | 作用 | 描述 |
| -d | 默认值 | 编译所有内核和所有固件类型。 |
| -b | soc类型 | 指定构建固件类型。单独写入构建固件名称,例如-b s905x3. 多个固件使用_连接,例如-b s905x3_s905d. 适用all于所有 SoC 型号。您可以使用以下代码:a311d, s905x3, s905x2, s905l3a, s905x, s905w, s905d, s905d-ki, s905, s922x, s922x-n2, s912, s912-m8s. 注:s922x-reva是s922x-gtking-pro-rev_a、s922x-n2是s922x-odroid-n2、s912-m8s是s912-mecool-m8s-pro-l、s905d-ki是s912-mecool-ki-pro、s905x2-km3是s905x2-mecool-km3 |
| -k | 内核版本 | 指定内核名称。单独写内核名称,例如-k 5.10.100. 多内核使用_连接如-k 5.15.25_5.10.100 |
| -a | 自动模式 | 设置是否自动采用同系列最新版本的内核。是时true,会自动在内核库中查找是否有-k5.10.100等指定的内核更新版本。如果有同系列的最新版本,会自动替换为最新版本。当设置为 时false,将编译指定版本的内核。默认值:true |
| -v | 内核分支 | 指定内核版本分支的名称,如-v stable. 指定名称必须与分支目录名称相同。stable默认使用分支版本 |
| -s | 分区大小 | 以 MB 为单位指定 ROOTFS 分区的大小。默认为1024,指定大小必须大于256。如-s 1024 |
sudo ./make -d:使用默认配置为所有 SoC 编译最新的 openwrt 内核版本。
sudo ./make -d -b s905x3 -k 5.10.100: 推荐。使用默认配置,指定内核和固件进行编译。
sudo ./make -d -b s905x3_s905d -k 5.15.25_5.10.100:使用默认配置,指定多核,多固件进行编译。用于_连接。
sudo ./make -d -b s905x3 -k 5.10.100 -s 1024:使用默认配置,指定内核、固件,并设置分区大小进行编译。
sudo ./make -d -b s905x3 -v dev -k 5.7.19:使用默认配置,指定型号,指定版本分支,指定内核进行打包。
sudo ./make -d -b s905x3_s905d:使用默认配置,指定多个固件,用于_连接。编译所有内核。
sudo ./make -d -k 5.15.25_5.10.100: 使用默认配置。指定多核,用于_连接。
sudo ./make -d -k 5.15.25_5.10.100 -a true: 使用默认配置。指定多核,用于_连接。自动更新到同系列最新内核。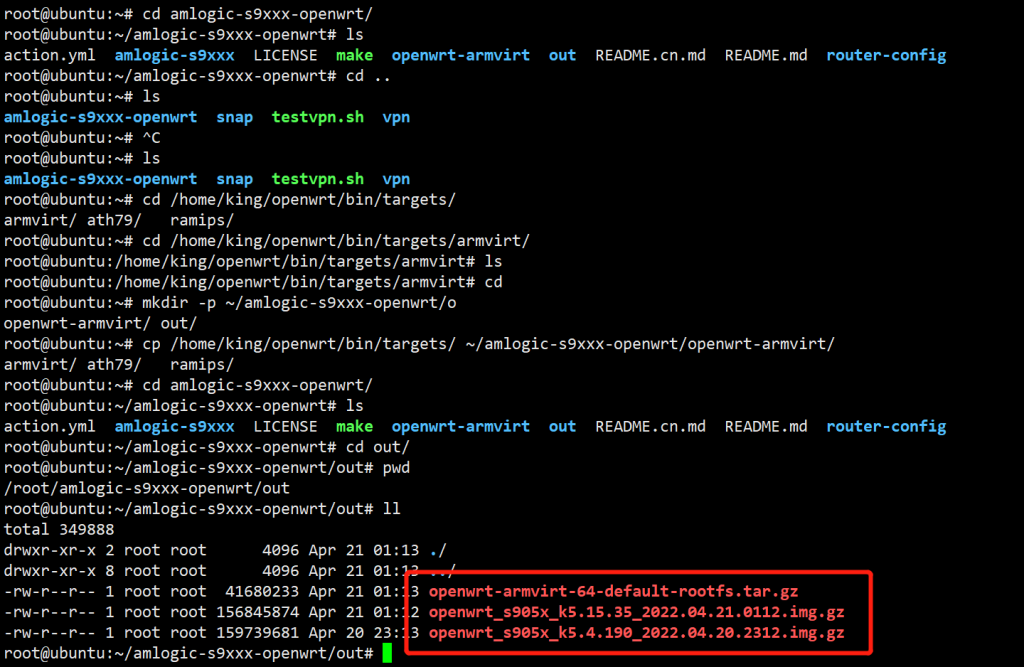
sudo ./make -d -s 1024 -k 5.10.100:使用默认配置,分区大小设置为1024m,只编译内核版本为5.10.100的openwrt固件。- 打包后的文件在~/amlogic-s9xxx-openwrt/out下
三、电视盒刷root版安卓系统
- 完全参照armbian刷机( 二、1.b860av2.1刷安卓已root固件)
四、SD卡或者U盘写入openwrt系统
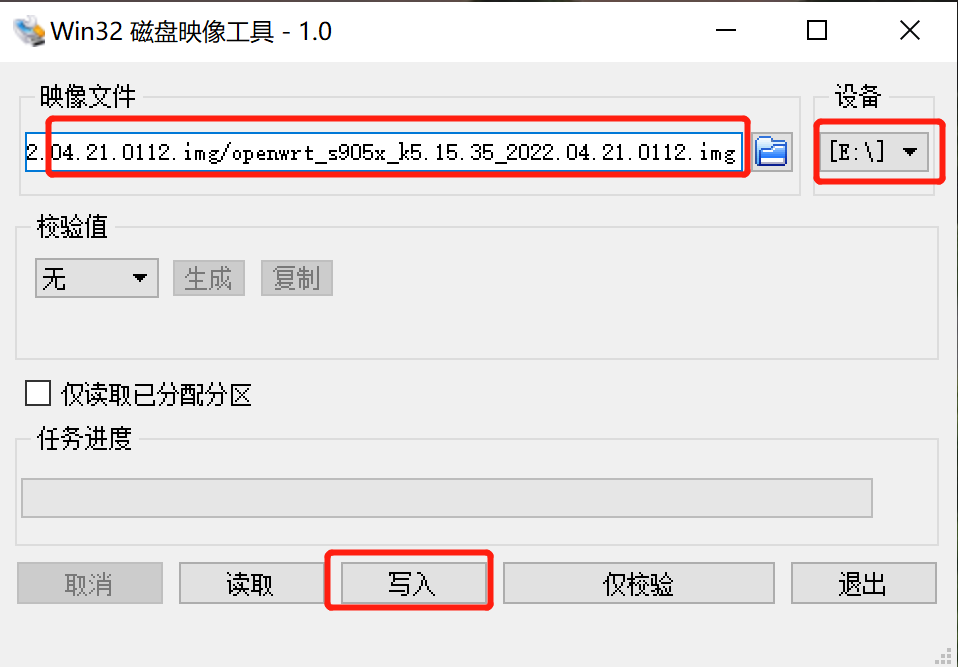
- 将生成的openwrt_s905x_k5.15.35_2022.04.21.0112.img.gz复制到windows桌面并解压
- 通过Win32DiskImager将openwrt_s905x_k5.15.35_2022.04.21.0112.img写入SD卡或者U盘
五、引导启动openwrt
- 在安卓盒子上安装LibreELEC引导软件(参考armbian刷机)
- 运行LibreELEC
- 系统从SD卡或者U盘启动
六、设置openwrt
- 连接usb键盘、连接电视盒到路由器(dhcp或者静态均可,根据实际情况修改配置)
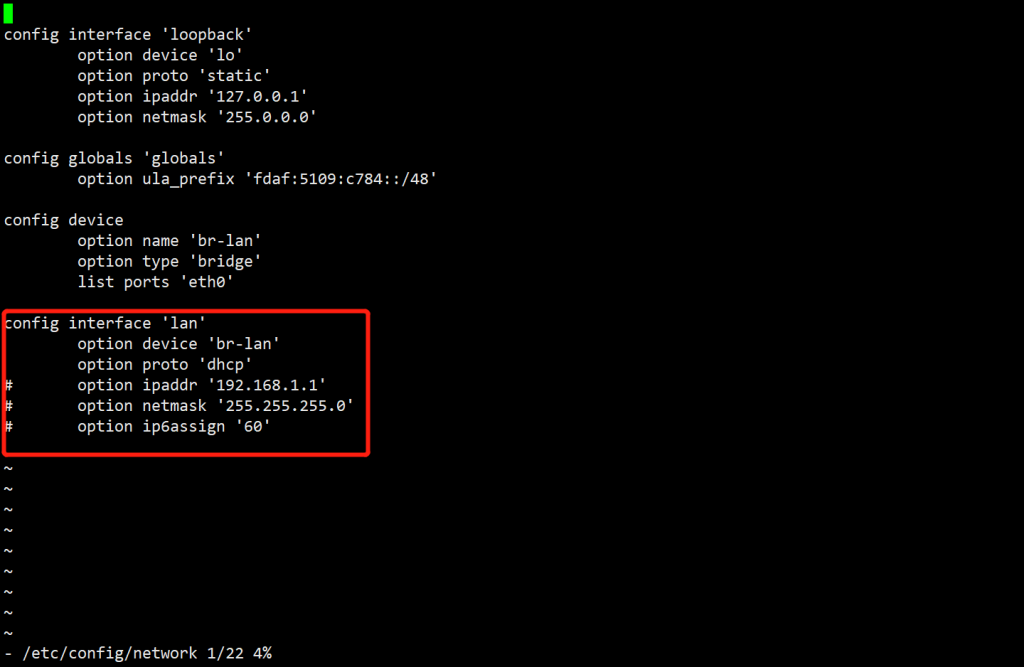
- 修改网络配置
root@OpenWrt:~# vi /etc/config/network- 注释掉静态ip配置
- 打开dhcp开关
- 重启网络
- 查看获取得ip地址
root@OpenWrt:~# /etc/init.d/network restart
root@OpenWrt:~# ifconfig
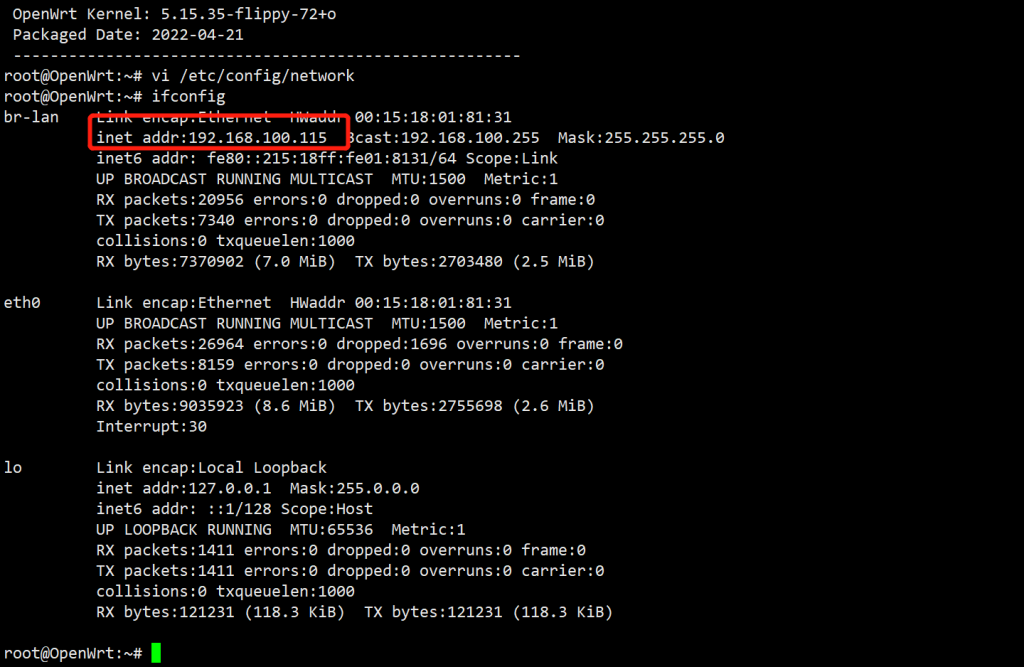
- 浏览器中打开http://192.168.100.115(具体ip)
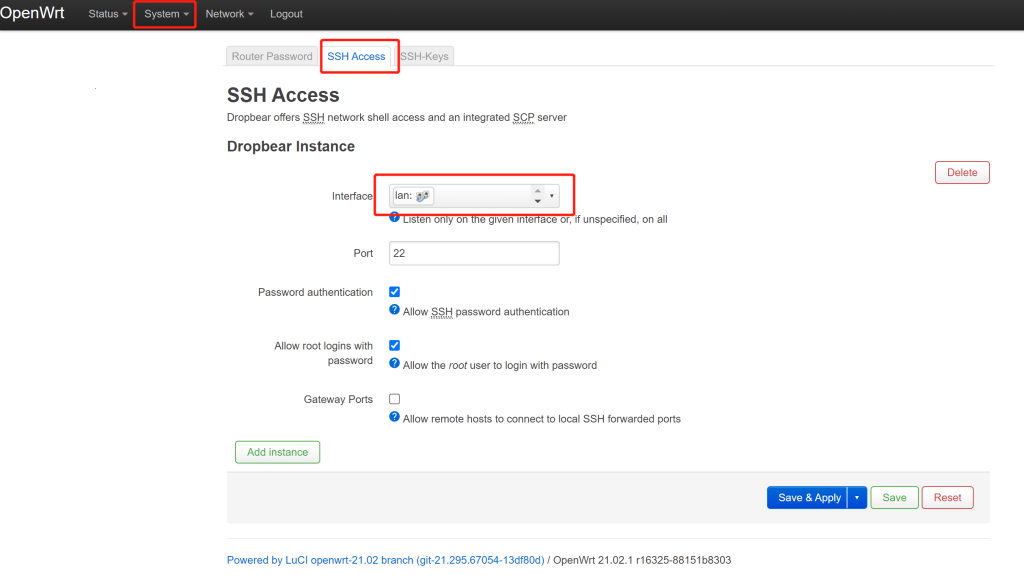
- 设置密码、打开ssh、修改主题、随意操作
- 可使用本站仓库安装相应插件
- 通过ssh连接电视盒子
- 修改/etc/opkg/distfeeds.conf文件
root@OpenWrt:~# vi /etc/opkg/distfeeds.confsrc/gz openwrt_core https://repository.pangzhai.cn/v21.02.1/targets/armvirt/64/packages
src/gz openwrt_base https://repository.pangzhai.cn/v21.02.1/packages/aarch64_cortex-a53/base
src/gz openwrt_kenzo https://repository.pangzhai.cn/v21.02.1/packages/aarch64_cortex-a53/kenzo
src/gz openwrt_luci https://repository.pangzhai.cn/v21.02.1/packages/aarch64_cortex-a53/luci
src/gz openwrt_packages https://repository.pangzhai.cn/v21.02.1/packages/aarch64_cortex-a53/packages
src/gz openwrt_routing https://repository.pangzhai.cn/v21.02.1/packages/aarch64_cortex-a53/routing
src/gz openwrt_small https://repository.pangzhai.cn/v21.02.1/packages/aarch64_cortex-a53/small
src/gz openwrt_telephony https://repository.pangzhai.cn/v21.02.1/packages/aarch64_cortex-a53/telephony- 下载签名公钥并安装
root@OpenWrt:~# cd /tmp/
root@OpenWrt:/tmp# wget https://repository.pangzhai.cn/public_key/pangzhai.pub
root@OpenWrt:/tmp# opkg-key add pangzhai.pub- 更新opkg插件列表
root@OpenWrt:~# opkg update
Downloading https://repository.pangzhai.cn/v21.02.1/targets/armvirt/64/packages/Packages.gz
Updated list of available packages in /var/opkg-lists/openwrt_core
Downloading https://repository.pangzhai.cn/v21.02.1/targets/armvirt/64/packages/Packages.sig
Signature check passed.
Downloading https://repository.pangzhai.cn/v21.02.1/packages/aarch64_cortex-a53/base/Packages.gz
Updated list of available packages in /var/opkg-lists/openwrt_base
Downloading https://repository.pangzhai.cn/v21.02.1/packages/aarch64_cortex-a53/base/Packages.sig
Signature check passed.
Downloading https://repository.pangzhai.cn/v21.02.1/packages/aarch64_cortex-a53/kenzo/Packages.gz
Updated list of available packages in /var/opkg-lists/openwrt_kenzo
Downloading https://repository.pangzhai.cn/v21.02.1/packages/aarch64_cortex-a53/kenzo/Packages.sig
Signature check passed.
Downloading https://repository.pangzhai.cn/v21.02.1/packages/aarch64_cortex-a53/luci/Packages.gz
Updated list of available packages in /var/opkg-lists/openwrt_luci
Downloading https://repository.pangzhai.cn/v21.02.1/packages/aarch64_cortex-a53/luci/Packages.sig
Signature check passed.
Downloading https://repository.pangzhai.cn/v21.02.1/packages/aarch64_cortex-a53/packages/Packages.gz
Updated list of available packages in /var/opkg-lists/openwrt_packages
Downloading https://repository.pangzhai.cn/v21.02.1/packages/aarch64_cortex-a53/packages/Packages.sig
Signature check passed.
Downloading https://repository.pangzhai.cn/v21.02.1/packages/aarch64_cortex-a53/routing/Packages.gz
Updated list of available packages in /var/opkg-lists/openwrt_routing
Downloading https://repository.pangzhai.cn/v21.02.1/packages/aarch64_cortex-a53/routing/Packages.sig
Signature check passed.
Downloading https://repository.pangzhai.cn/v21.02.1/packages/aarch64_cortex-a53/small/Packages.gz
Updated list of available packages in /var/opkg-lists/openwrt_small
Downloading https://repository.pangzhai.cn/v21.02.1/packages/aarch64_cortex-a53/small/Packages.sig
Signature check passed.
Downloading https://repository.pangzhai.cn/v21.02.1/packages/aarch64_cortex-a53/telephony/Packages.gz
Updated list of available packages in /var/opkg-lists/openwrt_telephony
Downloading https://repository.pangzhai.cn/v21.02.1/packages/aarch64_cortex-a53/telephony/Packages.sig
Signature check passed.
- 根据需要查找并安装插件
root@OpenWrt:~# opkg list | grep passwall
luci-app-passwall - 4.53 - LuCI support for PassWall
luci-app-passwall2 - 1.3 - LuCI support for PassWall 2
luci-i18n-passwall-zh-cn - git-22.109.31762-cc72d0a - Translation for luci-app-passwall - 简体中文 (Chinese Simplified)
luci-i18n-passwall2-zh-cn - git-22.109.31762-cc72d0a - Translation for luci-app-passwall2 - 简体中文 (Chinese Simplified)
root@OpenWrt:~# opkg install luci-app-passwall
七、openwrt系统安装位置切换
1、openwrt系统运行在USB或者SD卡
- 上述步骤已经实现该功能,但是U盘只用了1G左右,需要进行扩容
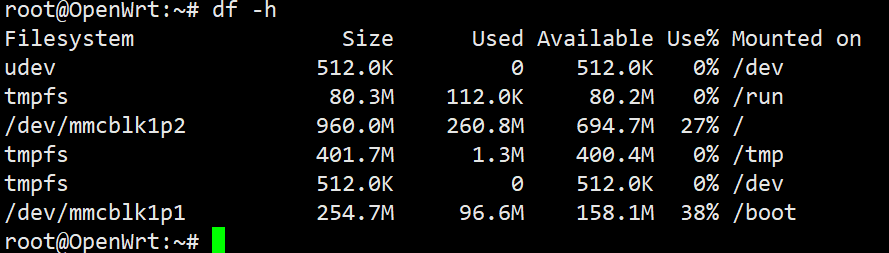
- 运行openwrt-tf命令
- 输入y后系统将自动进行分区及挂载扩容操作
root@OpenWrt:~# openwrt-tf
[STEPS] Try to create a shared partition ...
[STEPS] This operation will clear the data in the remaining space, are you sure to continue? y/n [y]
[STEPS] Fdisk starting ...
Welcome to fdisk (util-linux 2.36.1).
Changes will remain in memory only, until you decide to write them.
Be careful before using the write command.
Command (m for help): Partition type
p primary (2 primary, 0 extended, 2 free)
e extended (container for logical partitions)
Select (default p): Partition number (3,4, default 3): First sector (2048-15613951, default 2048): Last sector, +/-sectors or +/-size{K,M,G,T,P} (2629632-15613951, default 15613951):
Created a new partition 3 of type 'Linux' and of size 960 MiB.
Command (m for help):
Command (m for help): Partition type
p primary (3 primary, 0 extended, 1 free)
e extended (container for logical partitions)
Select (default e):
Selected partition 4
First sector (2048-15613951, default 2048): Last sector, +/-sectors or +/-size{K,M,G,T,P} (4595712-15613951, default 15613951):
Created a new partition 4 of type 'Linux' and of size 5.3 GiB.
Command (m for help): Partition number (1-4, default 4): Hex code or alias (type L to list all):
Changed type of partition 'Linux' to 'Linux'.
Command (m for help): Partition number (1-4, default 4): Hex code or alias (type L to list all):
Changed type of partition 'Linux' to 'Linux'.
Command (m for help): The partition table has been altered.
Syncing disks.
[STEPS] Create extended partition ...
btrfs-progs v5.11
See http://btrfs.wiki.kernel.org for more information.
Detected a SSD, turning off metadata duplication. Mkfs with -m dup if you want to force metadata duplication.
Label: EMMC_ROOTFS2
UUID: 8ef30dc4-cd88-4067-9385-df060882c575
Node size: 16384
Sector size: 4096
Filesystem size: 960.00MiB
Block group profiles:
Data: single 8.00MiB
Metadata: single 8.00MiB
System: single 4.00MiB
SSD detected: yes
Incompat features: extref, skinny-metadata
Runtime features:
Checksum: crc32c
Number of devices: 1
Devices:
ID SIZE PATH
1 960.00MiB /dev/mmcblk1p3
mke2fs 1.45.6 (20-Mar-2020)
Discarding device blocks: failed - I/O error
Creating filesystem with 1377280 4k blocks and 344688 inodes
Filesystem UUID: 31234836-2f70-45d5-bd7b-e50da77b1c5d
Superblock backups stored on blocks:
32768, 98304, 163840, 229376, 294912, 819200, 884736
Allocating group tables: done
Writing inode tables: done
Creating journal (16384 blocks): done
Writing superblocks and filesystem accounting information: done
[STEPS] Init the docker config ...
/usr/sbin/openwrt-tf: line 130: /etc/docker/daemon.json: No such file or directory
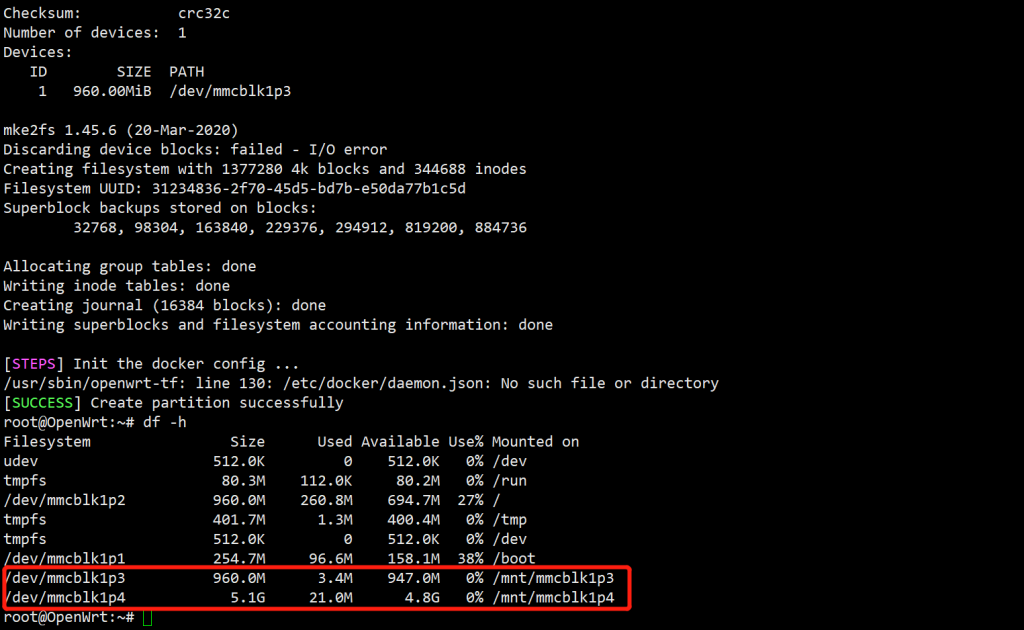
[SUCCESS] Create partition successfully
root@OpenWrt:~#
2、openwrt系统写入机载EMMC
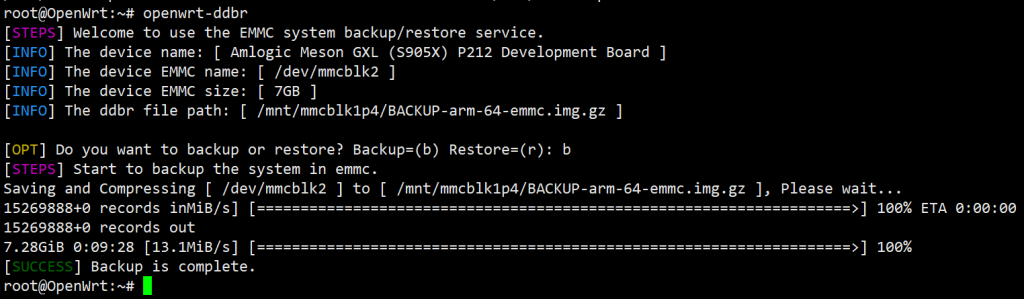
- 首先对现有的安卓系统进行备份,方便后续恢复安卓系统
- 备份文件默认放在/mnt/mmcblk1p4中,需要先按上述步骤进行U盘扩容
- 运行openwrt-ddbr命令
- 输入参数b进行备份操作,输入参数r进行恢复操作(前提是已经备份)
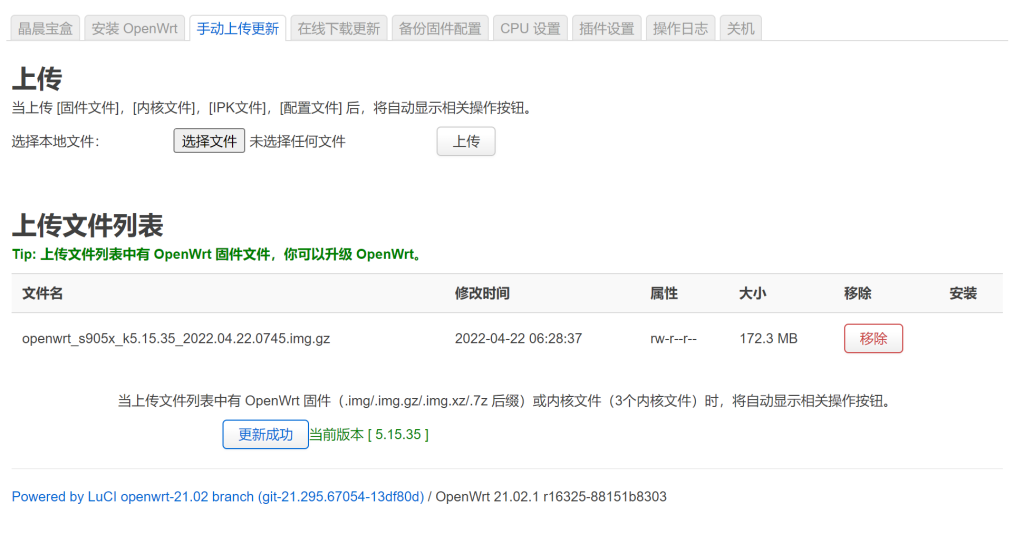
- 在浏览器中打开http://192.168.100.115
- 登陆到openwrt,找到系统中的Amlogic Service
- 点击install openwrt,如图选择并安装
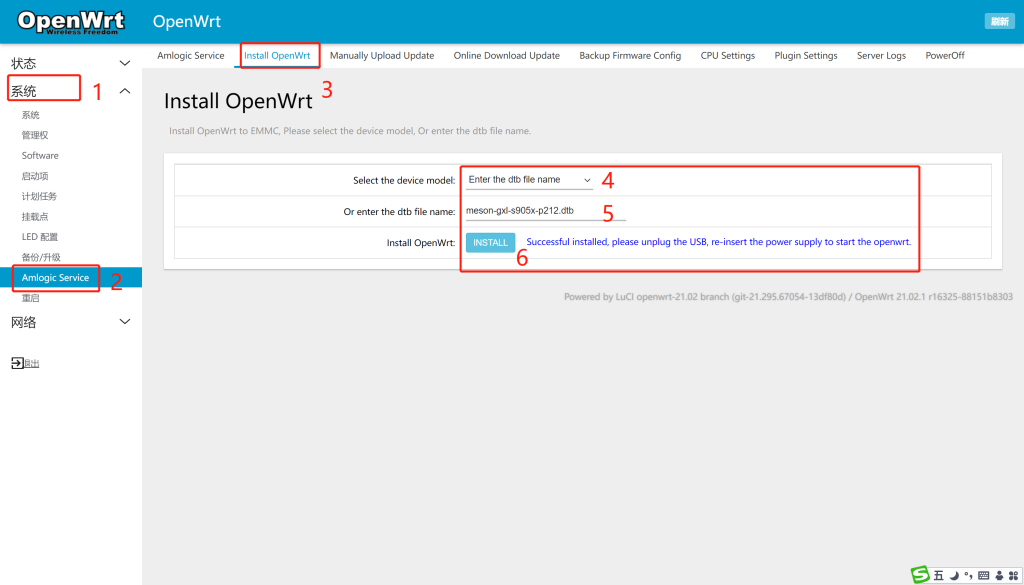
- 拔掉U盘,重启,则系统从emmc启动
- 后续如果想切换至安卓系统
- 插入带上述备份文件的U盘
- 重启从U盘启动系统
- 运行openwrt-ddbr 命令,选择r参数即可
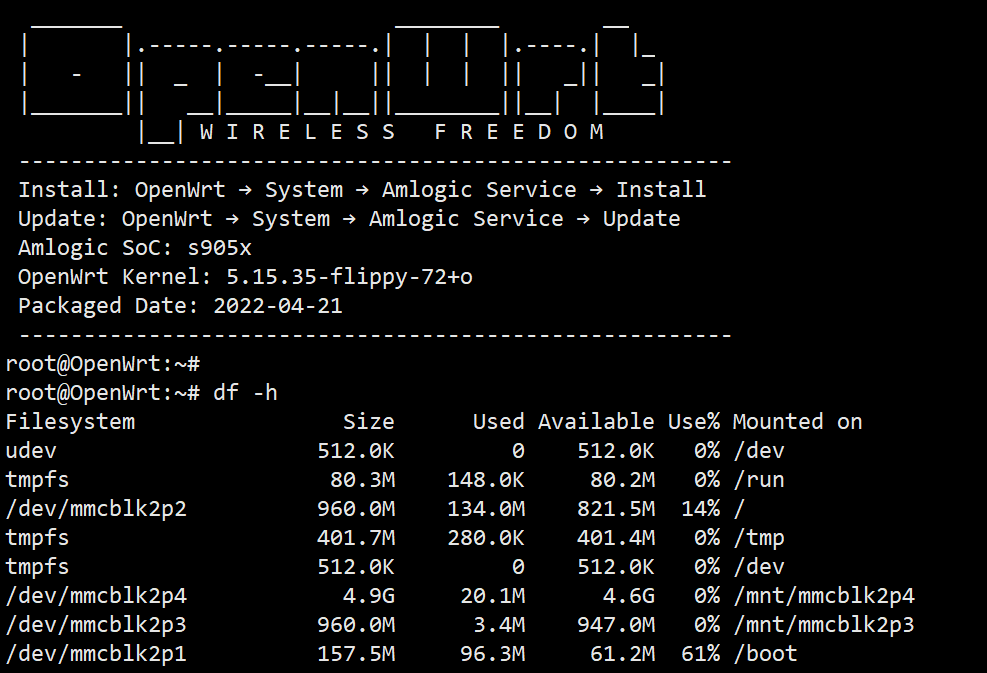
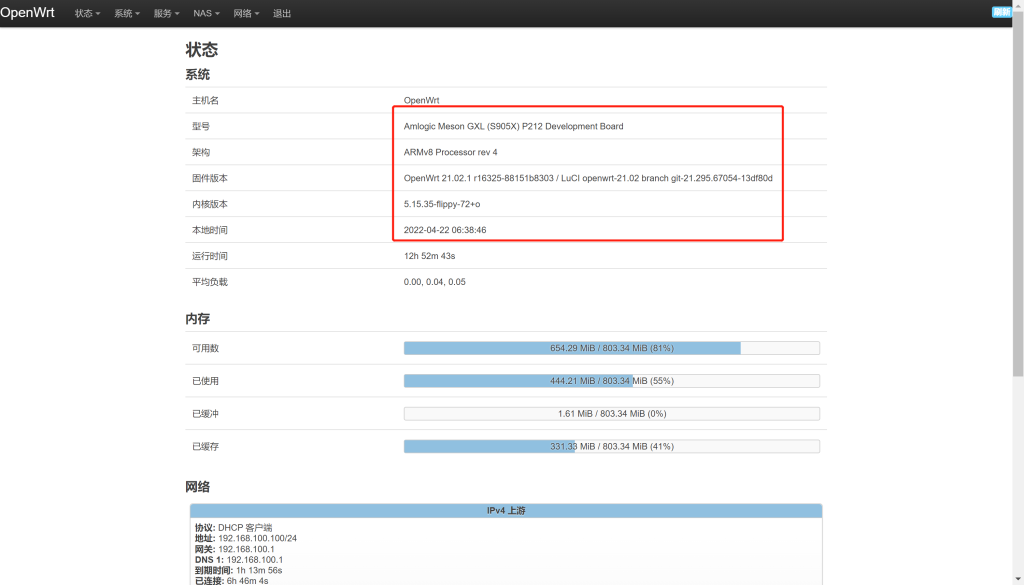
八、openwrt运行效果图

九、总结说明
- openwrt编译过程中内核版本为5.4.154
- 打包成电视盒固件过程中内核版本选的5.15.35
- 通过opkg 更新或者安装ipk包时选用5.4.154内核编译的文件一切正常
- 所以openwrt打包的过程虽然换了内核版本,但不影响底层的内核版本
- 要安装的ipk包的内核版本和openwrt编译过程的内核版本一致即可
- 胖宅花园将更新所有SOC版本最新的openwrt固件
- 需要安装的ipk也可通过本站仓库下载更新
- 如果手头的电视盒与现由型号不一致,可通过替换/boot/dtb中的dtb文件解决

wahaha
2022年11月29日 下午12:25
大哥请教个问题 中兴b860av2.1-a s905L2-b芯片的能刷嘛
胖宅
2023年2月7日 下午10:10
这个要试试才知道
student
2023年4月21日 下午8:09
对生成的arm版openwrt固件进行打包,适配Amlogic S9xxx 这一步
执行编译命令./make -d -b s905x -k 5.15.35 没有这个命令 胖老师下载的可能不是这个打包文件
git clone --depth 1 https://github.com/ophub/amlogic-s9xxx-armbian.git 这一条应该不对啊